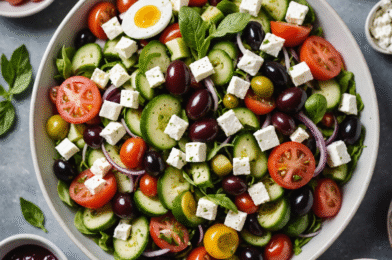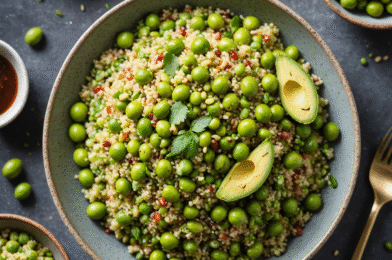
Quinoa, Avocado and Edamame Salad
Welcome to a culinary adventure with our Quinoa, Avocado, and Edamame Salad. This dish not only bursts with flavor but also packs a punch in terms of nutrition.
With simple preparation and minimal cooking time, it's an excellent choice for health-conscious individuals and those who love vibrant meals.
(Source: USDA)
Why You’ll Love This
You'll love this salad for its blend of textures and flavors. The quinoa provides a hearty base, while the avocado adds creaminess.
Edamame brings a fresh crunch, complemented by a zesty lime dressing. It's a versatile dish that can be enjoyed on its own or as a part of a larger meal.
Servings: 4 Prep: 15 min Cook: 15 min Total: 30 min Calories/serving (approx.): 350
Ingredients
- 1 cup (185g) quinoa, rinsed
- 2 cups (480ml) water
- 1 cup (150g) shelled edamame
- 1 avocado, diced
- 1 cup (150g) cherry tomatoes, halved
- 1/2 cup (75g) red bell pepper, diced
- 1/4 cup (30g) red onion, finely chopped
- 1/4 cup (15g) fresh cilantro, chopped
- 1/4 cup (60ml) fresh lime juice
- 2 tablespoons (30ml) olive oil
- 1 tablespoon (15ml) rice vinegar
- 1 teaspoon ground cumin
- Salt and pepper to taste
- 1/4 teaspoon red pepper flakes
- 1 clove garlic, minced
- 1/4 cup (30g) feta cheese, crumbled
- 1/4 cup (30g) sliced almonds, toasted
- 1 tablespoon (15g) chia seeds
Ingredient Notes (What & Why)
- Rinse quinoa under cold water to remove bitterness. (Source: Serious Eats)
- Use fresh or frozen edamame for convenience. (Source: BBC Good Food)
- Choose ripe avocados for the best texture. (Source: Bon Appétit)
- Adjust lime juice based on personal preference for acidity. (Source: NYT Cooking)
Equipment
- Fine mesh strainer
- Medium saucepan with lid
- Large mixing bowl
- Small whisk
- Measuring cups
- Measuring spoons
- Sharp knife
- Cutting board
- Garlic press
- Serving spoon
Timing & Temperature Guide
- Simmer quinoa on low heat for 15 minutes.
- Boil edamame in salted water for 3-5 minutes.
- Chill salad in refrigerator for up to 2 hours before serving.
- Toast almonds in a dry skillet over medium heat for 5 minutes.
- Let quinoa rest off heat for 5 minutes to absorb steam.
- Dress the salad just before serving for freshness.
- Store leftovers in the refrigerator at 4°C (40°F).
- Serve salad at room temperature or slightly chilled.
Step-by-step Instructions
- Rinse the quinoa under cold water using a fine mesh strainer.
- In a medium saucepan, bring 2 cups (480ml) of water to a boil.
- Add the quinoa to the boiling water, reduce heat to low, and cover.
- Simmer for 15 minutes or until the quinoa has absorbed all the water.
- Remove from heat and let it sit, covered, for 5 minutes to fluff.
- Meanwhile, cook the edamame in boiling water for 3-5 minutes.
- Drain the edamame and rinse with cold water to stop cooking.
- In a large bowl, combine the cooked quinoa, edamame, avocado, tomatoes, red bell pepper, red onion, and cilantro.
- In a small bowl, whisk together the lime juice, olive oil, rice vinegar, cumin, salt, pepper, red pepper flakes, and garlic.
- Pour the dressing over the salad and toss gently to combine.
- Sprinkle with feta cheese, toasted almonds, and chia seeds.
- Taste and adjust seasonings if necessary.
- Serve immediately or chill in the refrigerator for up to 2 hours before serving.
- Garnish with additional cilantro if desired.
Culinary Science Notes
- Quinoa is a complete protein, containing all nine essential amino acids {USDA, https://fdc.nal.usda.gov/}.
- Avocado is high in healthy monounsaturated fats {USDA, https://fdc.nal.usda.gov/}.
- Edamame provides a good source of plant-based protein {USDA, https://fdc.nal.usda.gov/}.
- Chia seeds expand in liquid, adding a unique texture to the salad.
- Lime juice helps prevent avocado from browning due to its acidity.
- The combination of fats and acids in the dressing enhances nutrient absorption.
- Toasting nuts enhances their flavor by releasing natural oils.
- Quinoa’s saponins, a natural coating, should be rinsed to avoid bitterness.
Pro Tips
- For extra flavor, toast the quinoa before boiling.
- Allow the salad to sit for a while to let the flavors meld.
- Use a sharp knife to cleanly dice the avocado.
- Roast the almonds lightly for a more pronounced nutty flavor.
- Add the dressing just before serving to keep ingredients fresh.
- To save time, use pre-cooked quinoa.
- Store leftover salad in an airtight container.
- Use a food processor to quickly chop vegetables.
- Consider adding a pinch of sugar to balance the acidity.
- Use a garlic press for finely minced garlic.
- If making ahead, add avocado right before serving.
- Taste as you go to adjust seasoning levels.
Variations
- Substitute quinoa with brown rice for a different texture.
- Add black beans for extra protein and fiber.
- Incorporate diced mango for a sweet twist.
- Use lemon juice instead of lime for a citrusy flavor.
- Add grilled chicken or shrimp for a heartier meal.
- Include roasted corn for a smoky taste.
- Try spinach or arugula for added greens.
- Use pine nuts instead of almonds for a buttery flavor.
- Sprinkle with nutritional yeast for a cheesy taste.
- Include diced jalapeños for a spicy kick.
- Replace feta with goat cheese for creaminess.
- Add sliced radishes for extra crunch.
Substitutions
- Use apple cider vinegar in place of rice vinegar.
- Swap olive oil with avocado oil for a milder taste.
- Replace cilantro with parsley if preferred.
- Opt for cashews instead of almonds for a different nutty flavor.
- Use cherry tomatoes or grape tomatoes interchangeably.
- Select green onions as a milder alternative to red onions.
- Choose lime zest instead of juice for a more subtle flavor.
- Replace cumin with smoked paprika for a different spice profile.
- Use hemp seeds in place of chia seeds for a nutty flavor.
- Substitute fresh tomatoes with sun-dried tomatoes for a tangy taste.
- Replace quinoa with farro for a chewy texture.
- Choose mozzarella instead of feta for a milder cheese.
Dietary Adaptations
- For a vegan option, omit the feta cheese.
- Ensure gluten-free by using certified gluten-free quinoa.
- Opt for low-sodium edamame to reduce salt intake.
- Use a dairy-free cheese alternative for lactose intolerance.
- Replace olive oil with flaxseed oil for additional omega-3s.
- Use a no-sugar-added vinegar for those monitoring sugar intake.
- Ensure nuts are unsalted for lower sodium content.
- Use a garlic-infused oil if fresh garlic causes sensitivity.
Serving Suggestions & Menu Ideas
- Serve with whole grain bread for a complete meal.
- Pair with grilled fish for a balanced dinner.
- Enjoy alongside a fresh fruit platter.
- Serve as a side dish at a barbecue.
- Top with poached eggs for a hearty breakfast.
- Add to a wrap with leafy greens for a portable meal.
- Serve with a side of hummus and pita bread.
- Pair with a light white wine, like Sauvignon Blanc.
- Enjoy with a mixed green salad for added freshness.
- Complement with a chilled gazpacho soup.
Menu Ideas
- Incorporate into a Mediterranean-themed dinner party.
- Pair with falafel and tzatziki for a Middle Eastern menu.
- Serve as part of a plant-based buffet.
- Include in a lunchbox with assorted vegetarian snacks.
- Offer as a side at a summer picnic.
- Present as a healthy option at a potluck.
- Include in a spread with various dips and spreads.
- Serve at a bridal shower for a light and elegant dish.
Seasonal Variations
- In spring, add fresh peas and asparagus tips.
- In summer, include diced cucumbers and radishes.
- In fall, incorporate roasted butternut squash.
- In winter, add pomegranate seeds for a festive touch.
- Use seasonal herbs like basil in the summer.
- Opt for citrus fruits like blood oranges in winter.
- Include roasted root vegetables in fall.
- Incorporate fresh corn in summer for sweetness.
Troubleshooting & Common Mistakes
- If quinoa is soggy, reduce cooking water next time.
- To prevent avocado browning, add it just before serving.
- For bland salad, increase lime juice or salt.
- If salad is too acidic, add a pinch of sugar.
- To avoid mushy edamame, don’t overcook.
- If dressing separates, whisk again before serving.
- For a dry salad, add more olive oil or lime juice.
- Ensure quinoa is correctly rinsed to remove bitterness.
- If salad is too spicy, reduce red pepper flakes.
- For a garlic-heavy taste, use less or roast garlic first.
- If the salad lacks crunch, add more toasted almonds.
- Ensure all ingredients are fresh for optimal flavor.
- Skipping the rinse for quinoa can lead to bitterness.
- Overcooking quinoa results in a mushy texture.
- Adding dressing too early can make the salad soggy.
- Using unripe avocados affects texture and flavor.
- Neglecting to toast nuts loses potential depth of flavor.
- Not adjusting seasoning to taste can leave the salad bland.
- Forgetting to chill the salad if serving cold.
- Adding too many bold ingredients can overpower the dish.
- Neglecting to mix dressing ingredients thoroughly.
- Using stale or old spices can dull the salad’s flavor.
Make-Ahead, Storage & Reheating
This salad can be prepared a day ahead. Store in an airtight container, and add avocado and dressing just before serving to maintain freshness.
Store leftovers in an airtight container in the refrigerator for up to 3 days. Do not leave at room temperature for extended periods.
This salad is best served cold or at room temperature. If desired, allow it to sit at room temperature for 15 minutes before serving.
Freezing, Leftovers & Scaling
Freezing is not recommended due to the fresh ingredients like avocado and tomatoes, which do not thaw well.
Creative Leftover Ideas
- Use as a filling for wraps with additional greens.
- Top with grilled tofu for a protein-rich meal.
- Mix with scrambled eggs for a breakfast option.
- Serve over a bed of mixed greens for a hearty salad.
- Add to a grain bowl with additional veggies.
- Incorporate into a stir-fry for a quick dinner.
- Use as a base for a burrito bowl.
- Toss with cooked pasta for a different take.
Easily scale this recipe up or down. Adjust ingredient quantities proportionally, and use larger mixing bowls for bigger batches.
Budget Notes & Substitutions
Quinoa and avocados can be slightly pricey, but buying in bulk or during sales can reduce costs. Opt for seasonal produce to save money.
Nutrition Facts
- High in protein from quinoa and edamame.
- Rich in healthy fats from avocado and olive oil.
- Low in saturated fats, supporting heart health.
- Contains dietary fiber aiding digestive health.
- Good source of vitamins C and E.
- Includes essential minerals like magnesium and potassium.
- Quinoa and chia seeds provide complete proteins.
- Avocado contains beneficial monounsaturated fats.
- Rich in antioxidants from fresh vegetables.
- Low in cholesterol, supporting cardiovascular health.
- Includes plant-based iron, beneficial for vegetarians.
- Contains folate from quinoa and edamame.
- Provides calcium from feta and chia seeds.
- Low in added sugars, enhancing overall diet quality.
- Includes phytonutrients from fresh herbs and vegetables.
Background & Origins
Quinoa is an ancient grain from the Andes, revered by the Incas as the 'mother of all grains.' Its resurgence in modern diets highlights its nutritional benefits. Avocado, native to Central and South America, has been cultivated for thousands of years.
Edamame, young soybeans, are a staple in Asian cuisines, celebrated for their protein content.
Glossary of Terms
- Quinoa
- A high-protein seed that is cooked and used like a grain.
- Edamame
- Young soybeans, often boiled or steamed in their pods.
- Chia Seeds
- Tiny seeds rich in omega-3 fatty acids and fiber.
- Feta Cheese
- A brined curd cheese traditionally made in Greece.
- Monounsaturated Fats
- Healthy fats found in avocados and olive oil.
- Saponins
- Bitter compounds on quinoa that should be rinsed off before cooking.
- Phytonutrients
- Natural compounds in plants that have health benefits.
- Antioxidants
- Substances that can prevent or slow damage to cells caused by free radicals.
FAQs
- Can I make this salad vegan?
- Yes, simply omit the feta cheese or use a plant-based cheese alternative.
- How do I keep the avocado from browning?
- Add it just before serving and toss with lime juice to slow oxidation.
- Can I use a different grain instead of quinoa?
- Yes, you can substitute with grains like farro, brown rice, or couscous.
- Is this salad gluten-free?
- Yes, as long as you use certified gluten-free quinoa.
- How long can I store leftovers?
- Store in the refrigerator for up to 3 days in an airtight container.
- What can I use instead of lime juice?
- Lemon juice is a great substitute for lime juice.
- Can I add protein to this salad?
- Absolutely, grilled chicken or shrimp are excellent additions.
- What if I don’t have fresh cilantro?
- You can use parsley or leave it out if desired.
- Can I prepare this salad in advance?
- Yes, prepare the ingredients and store separately, combining just before serving.
- Will the salad still taste good without the cheese?
- Yes, it will be slightly less creamy but still delicious.
- How do I toast almonds?
- Toast in a dry skillet over medium heat, stirring frequently until golden.
- Can I add more vegetables?
- Of course, feel free to add seasonal vegetables for more variety.
Ingredients
- 1 cup (185g) quinoa, rinsed
- 2 cups (480ml) water
- 1 cup (150g) shelled edamame
- 1 avocado, diced
- 1 cup (150g) cherry tomatoes, halved
- 1/2 cup (75g) red bell pepper, diced
- 1/4 cup (30g) red onion, finely chopped
- 1/4 cup (15g) fresh cilantro, chopped
- 1/4 cup (60ml) fresh lime juice
- 2 tablespoons (30ml) olive oil
- 1 tablespoon (15ml) rice vinegar
- 1 teaspoon ground cumin
- Salt and pepper to taste
- 1/4 teaspoon red pepper flakes
- 1 clove garlic, minced
- 1/4 cup (30g) feta cheese, crumbled
- 1/4 cup (30g) sliced almonds, toasted
- 1 tablespoon (15g) chia seeds
Instructions
- Rinse the quinoa under cold water using a fine mesh strainer.
- In a medium saucepan, bring 2 cups (480ml) of water to a boil.
- Add the quinoa to the boiling water, reduce heat to low, and cover.
- Simmer for 15 minutes or until the quinoa has absorbed all the water.
- Remove from heat and let it sit, covered, for 5 minutes to fluff.
- Meanwhile, cook the edamame in boiling water for 3-5 minutes.
- Drain the edamame and rinse with cold water to stop cooking.
- In a large bowl, combine the cooked quinoa, edamame, avocado, tomatoes, red bell pepper, red onion, and cilantro.
- In a small bowl, whisk together the lime juice, olive oil, rice vinegar, cumin, salt, pepper, red pepper flakes, and garlic.
- Pour the dressing over the salad and toss gently to combine.
- Sprinkle with feta cheese, toasted almonds, and chia seeds.
- Taste and adjust seasonings if necessary.
- Serve immediately or chill in the refrigerator for up to 2 hours before serving.
- Garnish with additional cilantro if desired.
- For extra flavor, toast the quinoa before boiling.
- Allow the salad to sit for a while to let the flavors meld.
- Use a sharp knife to cleanly dice the avocado.
- Roast the almonds lightly for a more pronounced nutty flavor.
- Add the dressing just before serving to keep ingredients fresh.
- To save time, use pre-cooked quinoa.
- Store leftover salad in an airtight container.
- Use a food processor to quickly chop vegetables.
- Consider adding a pinch of sugar to balance the acidity.
- Use a garlic press for finely minced garlic.
- If making ahead, add avocado right before serving.
- Taste as you go to adjust seasoning levels.